
Trail4R.com/Dustin Smith | Aug 25, 2021

Fire Extinguisher Access When Off-Roading & Overlanding – Where Should You Mount A Fire Extinguisher in the 5th Gen 4Runner
If you’re at all like me, you pick up mods for your rig pretty regularly, unsuccessfully attempt to justify them to your significant other once the charge hits the credit card bill, or you have to explain what you did in the garage all weekend, and why your buddies rigs were blocking the driveway for 6 hours.
When shopping for a fire extinguisher to add to my vehicle, I chose two 2.5 lb. units from H3R Performance, a MaxOut™, and a HalGuard™. A high-quality product with metal used for key components, backed by wonderful customer service, based right here in Northern California.
This “mod” (and I hesitate to call it a mod) is pretty easy to justify. It can literally be a matter of life or death. And the install won’t take you away from your familial duties for more than a couple hours.
Why have a fire extinguisher? Or two?

Sadly, the site of scorched earth and blackened forests is far too common in the West these days. In the last few years, wildfires have dominated the news and even decimated towns. The smoke from wildfires turned day to night in the San Francisco Bay Area last year. We had one day in SF that literally looked like a scene from BladeRunner. No exaggeration.
As of May 15 this year, 41 of California’s 58 counties were already in a drought state of emergency, affecting approximately 30% of the state’s population. As we move into August, wildfires rage in the West, and experts anticipate the drought’s impacts will only get worse. This isn’t media fear-mongering. It’s a harsh reality. As a result, fire education and preparedness are more important than they’ve ever been.
Most of us think primarily about wildfires ignited by sparks from a campfire. You’ve probably taken the fire safety test online and printed out the “certificate”. You take all the precautions: clearing away dry materials, having a shovel and bucket of water handy. But you don’t think about your rig catching fire and being destroyed. Or worse yet, the destruction that fire can do if it’s not put out immediately. The stats say it’s definitely something you should think about.
In 2019, local fire departments responded to an estimated 1.3 million fires. These fires caused roughly 3,700 civilian fire deaths and 16,600 reported civilian fire injuries. Property damage was estimated at $14.8 billion. Vehicle fires accounted for 17 percent of the fires and civilian deaths and 12 percent of civilian injuries.
If you do the math, you’ll find that 223,000 vehicle fires caused 644 civilian fire deaths, 2,000 civilian fire injuries, and $2.2 billion in direct property damage. (Via the NFPA.)
As off-road enthusiasts and overlanders, there are two types of fires that directly pertain to us:
- Fires started as a direct or indirect result of our vehicles.
- Fires started by fires we create for warmth and comfort.
For dealing with these two types of fires, it helps to have two types of extinguishers: clean agent, and dry chemical.
There are more types available, but we’ll focus on these two as they should meet the needs of the weekend warrior, and they’ll be the ones we install.
The Two Options:
- HalGuard HG250, 2.5 lbs. clean agent: available in red, black, or chrome
- MaxOut MX250, 2.5 lbs. dry chemical: available in red, black, or chrome
Dry Chemical – MaxOut

The legally required fire extinguishers you typically see in a home or office are usually dry chemical units.
Dry Chemical fire extinguishers are also generally found in motorsport applications (I think what we do qualifies as a motorsport?) The MaxOut, specifically offers proven defense against flammable liquid fires without conducting electricity back to you, as water would. Never use water on an electrical fire! Grab a dry chemical extinguisher if your camp stove gets out of control, or the campfire starts to escape its boundaries. They can also be used for vehicle fires, but a clean agent extinguisher will be less likely to damage crucial parts of your rig. This “general use” functionality of the DC unit is why I’ll be mounting it in the back. I want it easily accessible when I’m cooking on the Ultraswing mounted camp table, or when I’m around the campfire.
MaxOut extinguishers containing more than 1 lb. of the agent are also rated for common combustibles like wood, paper, rubber, and some plastics. This added effectiveness makes them ideal for outdoor, marine, and home use as well.
Details
- Overall: General use as well as motorsports applications at a low cost
- Very good effectiveness
- Does not cause thermal shock or static shock when discharged
- Potential damage to surface finishes and electrical components
- Requires immediate cleanup
Find It Online
- H3R Performance MaxOut Dry Chemical Fire Extinguisher 2.5 lb: Check Price
Clean Agent – HalGuard

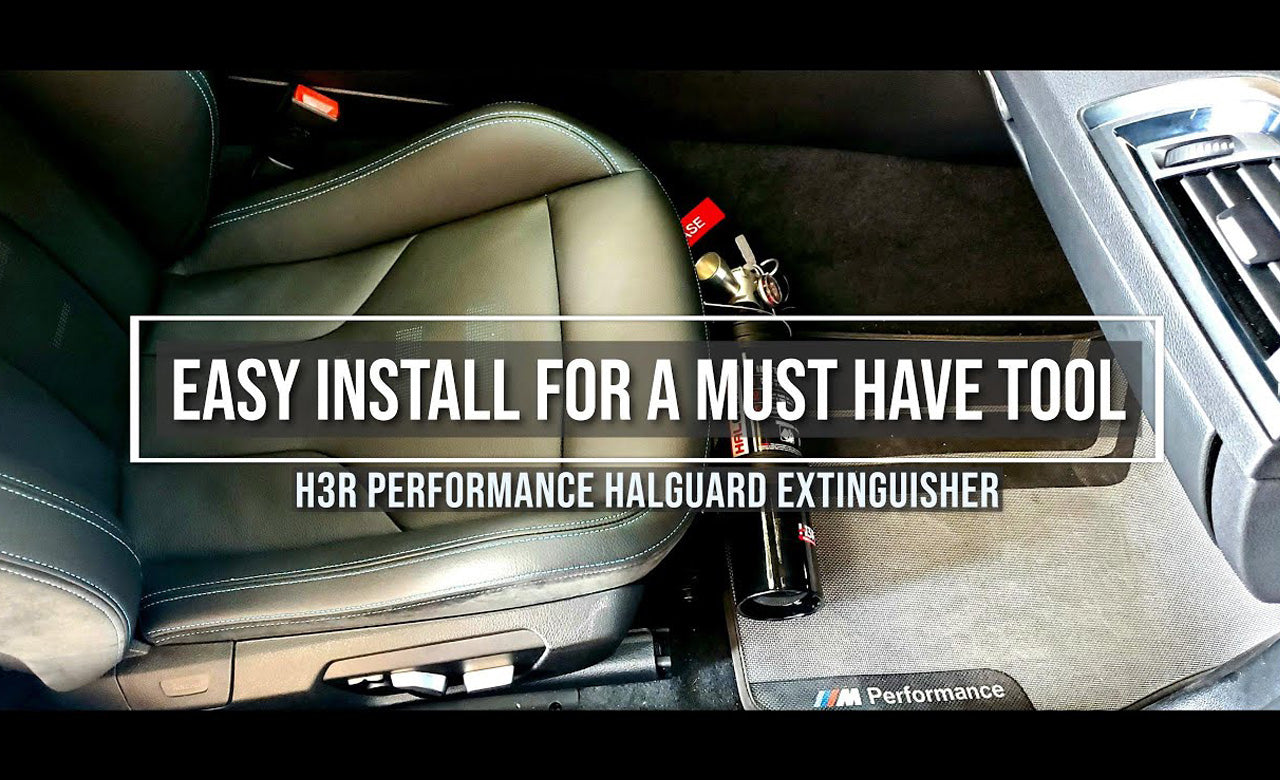
The HalGuard clean agent extinguisher we’re installing, contains Halotron® 1, an electrically non-conductive “clean” extinguishing agent that rapidly turns into a gas. Halotron® 1 has passed extensive testing by Underwriters Laboratories and meets FAA requirements. It can be found on commercial aircraft and is used by airport firefighters. It’s definitely not your typical, red, office extinguisher. Unless your office happens to be a 747. If my “landcraft” spontaneously combusts, this is the extinguisher I want at arms length to put it out, and hopefully drive away with minimal damage to expensive electronic equipment, aka, my rig. I’ll be mounting this under the driver seat with the nifty, black, powder coated seat mount provided by H3R Performance.
Details
- Overall: Clean agent for minimal damage to sensitive electronics
- Good effectiveness
- Does not cause thermal shock or static shock when discharged
- Does not leave a corrosive residue
- Maintains good user visibility during discharge
- Attacks fire in hard-to-reach areas
Find It Online
- H3R Performance HalGuard Clean Agent Fire Extinguisher 2.5 lb: Check Price
Fire safety classifications
Underwriters Laboratories classifies and rates fire extinguishers on their ability to put out various classes and sizes of fires. The ratings are A, B, C, D and K.
- A - ORDINARY COMBUSTIBLES: Wood, paper, cloth, trash and other ordinary materials.
- B - FLAMMABLE LIQUIDS AND GASES: gasoline, oils, pain lacquer and tar.
- C - FIRES INVOLVING LIVE ELECTRICAL EQUIPMENT
- D - COMBUSTIBLE METALS OR COMBUSTIBLE METAL ALLOYS
- K - FIRES IN COOKING APPLIANCES THAT INVOLVE COOKING MEDIA: animal or vegetable oils and fats.
The two extinguishers we’re installing are H3R Performance Class BC and ABC extinguishers, which are most appropriate for the types of fires likely to occur in an automotive environment. For more information, go here and scroll down to “What do UL fire classifications mean?”.
Why name brands are important?

For a company to lawfully market, distribute, or sell fire extinguishers in California, the extinguisher must comply with the requirements in the National Fire Protection Association’s NFPA 10, which “provides requirements to ensure that portable fire extinguishers will work as intended to provide a first line of defense against fires of limited size.” They also MUST have been examined by and bear the label of Underwriters’ Laboratories Inc. or another testing laboratory approved by the state fire marshal as qualified to test fire extinguishers. (Cal. Health & Safety Code, sections 13160-13161).
I’d guess most reading this have seen “UL” listed, or heard of “Underwriters’ Laboratories”, but don’t really know who they are. Underwriters’ Laboratories, Inc. is the global safety science leader. “UL helps companies to demonstrate safety, enhance sustainability, strengthen security, deliver quality, manage risk and achieve regulatory compliance.” Not sure it could sound any more legit.
The UL® Mark is a positive representation that the extinguisher meets or exceeds the requirements of the NFPA 10, ANSI/UL 711 and ANSI/UL 299 safety standards. It’s a valuable independent third-party validation of an extinguisher’s compliance with these requirements that enable the product to be legally sold in most states.
UL does more than allow a manufacturer to display the UL® Mark on a fire extinguisher. An integral part of this authorization is a continuous process of scrutiny by UL of the manufacturer’s manufacturing and quality assurance processes by regular onsite inspections of the manufacturing facilities, QC controls, and record keeping. All of this adds up to an increased level of comfort that the fire extinguisher will perform, and will protect life and property.
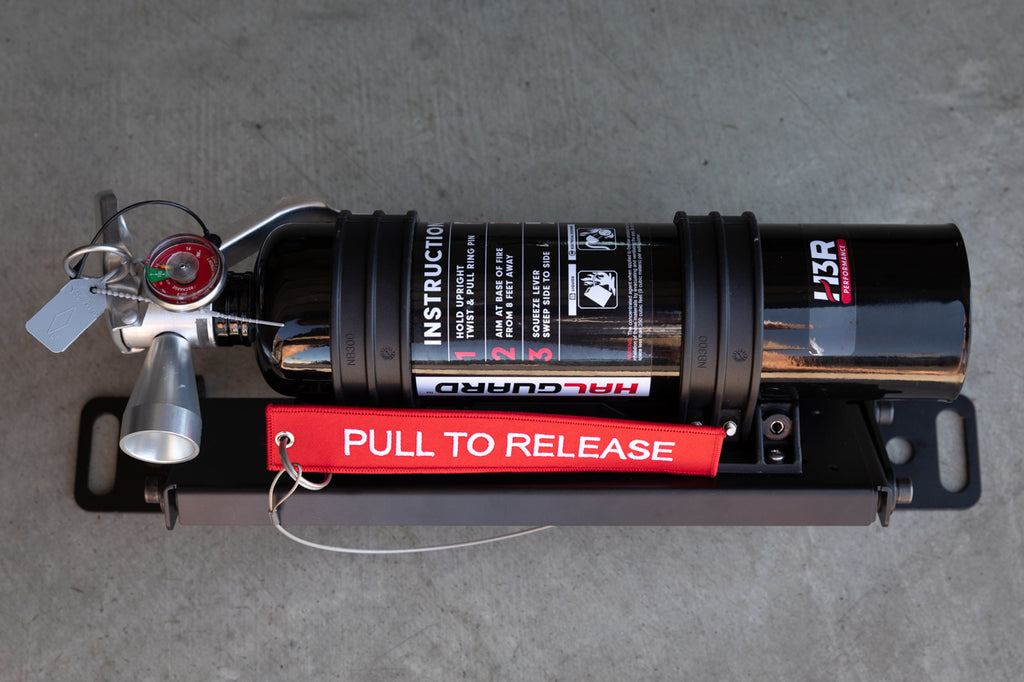
A quick side note, the jacking screw, as seen in the image above, can be removed once the billet clamp is installed on the extinguisher.
Choose your fire extinguisher carefully

The quantity and type of extinguishing agent, discharge time, agent flow rate and discharge range all combine to influence an extinguisher’s effectiveness.
Question any extinguisher that hasn’t been tested to a recognized USA standard such as ANSI/UL 711. A UL-listed fire extinguisher has passed rigorous, standardized, repeatable tests that prove its effectiveness on certain types of fires.
Some non-UL-listed extinguishers tout a discharge time much longer than the typical 9-10 seconds of a small UL-listed extinguisher. But the UL listed extinguisher is designed to put out the fire more quickly (thanks to its greater flow rate), and from a safer distance (thanks to its longer discharge range).
A long discharge time is meaningless at best – and downright scary if you need to be two feet from the fire!
So, where should you mount them?

First and most important of all… Mount them.
The last thing you need is a steel projectile blasting through your vehicle in a collision. The 2.5 lb can has an actual weight of 5 lbs. Second, mount them where you’ll have easy access.
Under the seat is a no-brainer. But, make sure you don’t mount them literally under the seat. If your phone falls down there, like mine often does, you know it’s not easy to access. The available H3R Performance seat mount puts the extinguisher in front, slightly under the seat where it’s easy to grab when you need it.
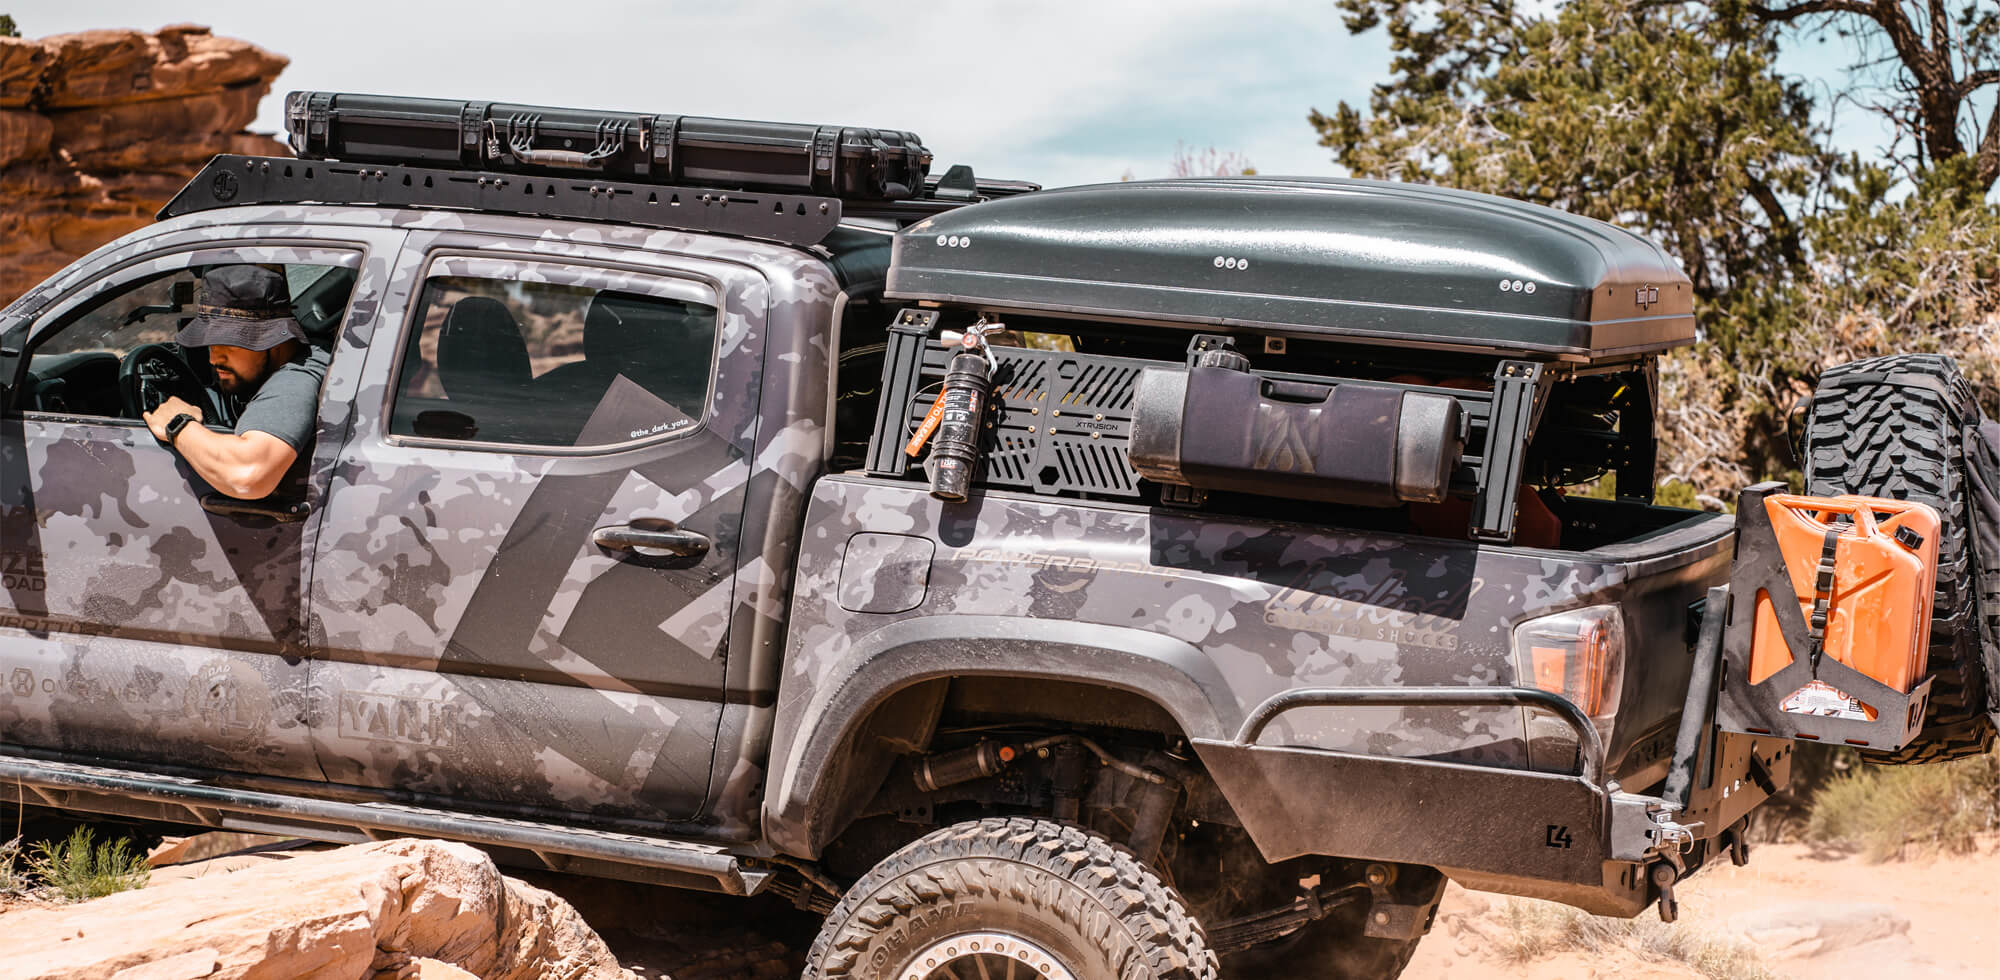
On a rear molle panel is another great option. Molle panels allow for all sorts of easy mounting options. Currently, I don’t have any rear panels. I also have drawers and a fridge which gives me fewer options. So, I’ll be focusing on the front install, and sharing some ideas from the Instagram community on where to mount a fire extinguisher in the rear of the vehicle.
Seat-Mounted HalGuard Fire Extinguisher

The most driver-accessible location to mount a fire extinguisher is in the front of your passenger seat, and with the Universal Seat Mounts available through H3R Performance. As mentioned, we’re mounting our HalGuard Clean Agent extinguisher here, as it’s the one we want to grab if a fire starts in the rig while we’re driving. Some vehicle fires are caused by collisions, but most start due to problems with the vehicle’s electrical wiring, fuel system, or even cigarettes left in the car (Don’t smoke, kids!), and then the engine catches fire.
I’ve done a lot of extra electrical work under the hood, and I’ve done it by the book. But, not everyone takes every precaution, and I’ve seen some rigs with quite the engine bay full of spaghetti. Just saying.
This extinguisher will also work if a spark from the rig ignites some dry brush or grass. The key here is that it won’t damage your rig as much as the dry chemical version. So, having it on-hand in the vehicle for vehicle-based fires is the priority, and why this extinguisher costs more than double its dry chemical brethren.
Find It Online
- H3R Performance Universal Fire Extinguisher Seat Mount: Check Price
- H3R Performance Extreme Duty Quick Release Fire Extinguisher Mount: Check Price
Tools you need
- 5/32" hex head wrench
- 1/4" hex head wrench
- Thin wall 1/4" socket
- 11/32" socket
- 1/2" wrench
Step 1: Seat Mount & Bracket
Step one requires you to assemble the Universal Fire Extinguisher Seat Mount and the Extreme Duty Quick Release Fire Extinguisher Bracket.
For this install, you’ll need these two products. We’ll refer to them as the “Seat Mount” and “Bracket” for short.
The seat mount has slots and holes that allow it to be adjusted to quite a few different seats in a range of vehicles without the need to drill mounting holes in the rig.
Universal Fire Extinguisher Seat Mount (Seat Mount)

Extreme Duty Quick Release Fire Extinguisher Bracket (Bracket)

The flat plate (upper right) of the bracket attaches to the seat mount, and the bracket back (rod-shaped black piece just below it) attaches to the fire extinguisher with the c-shaped nylon straps on the left.
Start by assembling the mount and tightening the fasteners just enough that you can still slide the metal plates into the right position to fit your vehicle. It took me a bit of time to sort out the exact seat mount position. Since we’re 5th Gen 4 Runner folks here, you can use the following photos as a starting point and save some time.
I tried to allow for maximum leg room, as well as clearance for the seat to move forward as far as possible. The seat will contact the mount if it goes too far forward. But, mine had enough forward movement that a 6ft tall human can fit comfortably in the back seat.
When assembling the seat mount, you’ll also need to install the Flat Nylon Mount from the bracket kit. Rather than go into how to assemble each bolt and nut (which the H3R Performance provided instructions will do), I find it easier to look at pictures and assemble it accordingly. Again, tighten everything just enough so that you can still move the parts to adjust to the mount to your desired position.


Notice the Quick Release Pin Lanyard attached to the bolts shown below.
It seems you can attach the lanyard to a few places, but this was the most out of the way so my lady’s feet won’t get tangled in it, and also gave enough slack that I can easily remove the QR pin when needed.


Once you have the seat mount and bracket flat plate assembled as above, you’ll need to assemble the bracket clamps and bracket back onto the extinguisher itself.
Start by sliding the straps onto the extinguisher with one positioned above the label, and one below. For this mounting location, the slotted end of the bracket back will be toward the bottom of the extinguisher, and the grooves on the shaft of the bracket back will be toward the body of the extinguisher as below.

Using a 4mm hex-head wrench, insert the four provided screws through the straps from the side farthest away from the threaded brass inserts. Thread all four into the brass inserts, then tighten all four. With a thin-wall 1/4" socket, fasten the corresponding nuts to the screws. Do not over-tighten the screws or nuts!

Once the straps and bracket back are assembled, you should have these two assemblies:
- Top: seat mount with flat-mount attached.
- Bottom: HalGuard fire extinguisher with the straps and bracket back.

These two assemblies go together as below, by sliding the notched end of the bracket back (attached to the extinguisher) onto the fixed pin on the flat-mount (attached to the Seat Mount). The Quick Release Pin will hold them together.
Once you have this set up, you’re ready to dive into the install and test-fit the Seat Mount. Remember, the mount bolts should still be loose enough to make adjustments.
Step 2: Test fit and install the Seat Mount
To create space to work, it helps to remove the floor mats and slide the seat back as far as it will go.

Next, reach under the plastic covers that hide the seat bolts. It takes a little effort, but work your fingers under the inner edge and wiggle until they pop loose. Careful not to break them. I was relatively rough with mine and had no issues, but I don’t want you mad at me, so be careful.

Once both covers are off, set them aside. When the extinguisher is mounted, you won’t be able to replace these. So, add them to your collection of stock parts you’ve removed for previous mods.

Next, remove the seat bolts. I used a 3/8 inch ratchet, an extension, and a 14 mm socket.

Once the bolts are removed, slide the full Seat Mount into position with the slotted mounting tabs under the metal seat tabs. This is when it helps to have the bolts on the Seat Mount loose enough to adjust the bracket into the right position. Compress or extend it lengthwise to align the mounting tabs to the holes in the floor, then insert the bolts and tighten, leaving them slightly loose so they are also able to be adjusted.

Once the Seat Mount is loosely installed, slide your seat forward and back, checking the position of the mount. The seat will bump the mount before it’s fully forward, but as mentioned, mine gave plenty of room to a tall rear passenger before it hit the mount.

Insert the extinguisher and Quick Release Pin, and do the same seat and legroom checks in the front and back. Also, check to make sure the Pin is easily removed and the extinguisher has clearance as well.

Once you have the right position, tighten the seat bolts all the way. I didn’t use a torque wrench, but if you have one handy, torque to about 27 ft-lbs.
This is how it should look when finished. Notice that I have the extinguisher rotated inside the straps so the opening is up, and slightly angled inward. I did this for two reasons.
- It’s in a position where the trigger cannot be kicked.
- The opening is partially covered by the seat, so it’s protected from debris from above. Mainly nuts, chips, and possible some spilled bubbly water.

Rear Mount
We cook on the Ultraswing camp table which opens to the passenger side, and tend to park the rig with this side facing camp (Our iKamper opens to the passenger side as well). So, mounting the Dry Chemical fire extinguisher on this side of the rig makes the most sense, as it will be closest for us to grab if needed. The best place to mount the extinguisher seems to be on a Molle panel in the passenger side window. There are a few companies that make great cargo bay molle panels. If you don’t have molle panels, you will likely have to do some drilling. The H3R Performance Billet Clamp and Flat Mount set is a simple option that just utilizes just a few screws.


Find It Online
- H3R Performance Quick release billet band clamp: Check Price
- H3R Performance Billet flat-mount: Check Price
Molle panels are on my wish list, and I plan on installing the extinguisher when I get them. For now, I’m going to stow it in my rear drawers and pull it out so it’s handy when we cook or have a campfire.
Once again, you can still see the jacking screw towards the middle of the clamp. Remember to remove it.
Final Thoughts

With the current situation across the US, and many states in the West moving into fire danger for the summer, fire safety and preparedness is a must. This includes effective, UL listed, brand-name fire extinguishers, mounted in easy-to-access locations in the front and rear of the rig.
If you can, buy and install two extinguishers:
- A clean agent extinguisher to mount up front for potential vehicle fires, which most often occur in the engine bay. Clean agent extinguishers do very little damage to sensitive electrical components.
- A dry chemical extinguisher in the rear of the vehicle for campfires gone wild, or anything that goes awry around the camp kitchen. They’re a “general purpose” extinguisher, are a bit more effective overall, are half the price of the clean agent extinguisher, but can do damage to electrical components.
Most importantly, be safe. Follow national and local fire safety guidelines. Do your research on the area(s) you’re traveling to before you leave. If you know that campfires are banned in an area, don’t bring firewood. Think about safer propane options if you need a fire. And if all fires are completely banned, FOLLOW THE RULES. It’s not fun to sit around an electric lantern and tell ghost stories. But it’s a lot scarier explaining your carelessness to the local authorities as a wildfire of your creation rages through the forest.